
Create a Repository in the Project Directory
- In the Package Explorer right click on the project name.
- Select Team->Share Project. The Configure Git Repository dialog is displayed.
- Check the box by Use or create repository in parent folder of project.
- In the selection area, click on the project folder. The name is duplicated in the box below.
- Click the Create Repository button.
- Click Finish. The repository shows in the list of the local repositories view.
- In the repositories view, select the repository just created. The unstaged project files are displayed in the Unstaged Changes view.
Configure Push Operation
- In repository view, right-click on the Remotes node.
- In the pop-up dialog window, click Create Remote. The New Remote dialog window is displayed.
- Accept the origin default value. Click OK.
- In the next dialog window, click the Change button.
- Enter the URL of the remote github location. The other values should be filled automatically.
- Click Finish.
- Click Save.
Merge Local and Remote Repositories
- In the Remotes node under origin, look for the green arrow pointing down, this is the Fetch arrow. Right click on the Fetch entry and select Configure Fetch in the popup window. You should see the URI, assure that it points to the remote repository.
- Look in the Ref mappings section of the popup. It might be empty. You must indicate which remote references you want to fetch. Click Add.
- Type in the branch name you need to fetch from the remote repository, usually master.
- Continue through the wizard. Ignore the warning Remote tracking branch ‘refs/remotes/origin/master’ not found in local repository.
- Click Finish.
- In the last popup window, click Save and Fetch. This will fetch the remote reference
- Click OK.
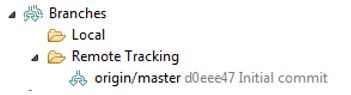
Look in the Branches folder of your local repository. You should now see the remote branch in the Remote Tracking folder. You should see something similar to the following:
- You should have a list of un-staged files. Stage all the project files but one (we need a second staging later to push all the committed files).
- Enter a comment such as “first commit”.
- Click the Commit. This puts the project under configuration control. in the Local folder, you should see something similar to the following:

- Expand the Local folder of Branches, right click on the node named master.
- Select Merge. The Merge wizard is displayed.
- In the Merge wizard, under Remote Tracking folder, select the remote branch named origin/master.
- Click Merge.
- Follow the merge wizard steps.
- Now stage the remaining file. Add comment “first commit”.
- Click the Commit and Push
- Go through the Wizard steps.
- Click the Finish.
- Wait for the push operation to be configured and then click the OK button.